Friday, December 24, 2021

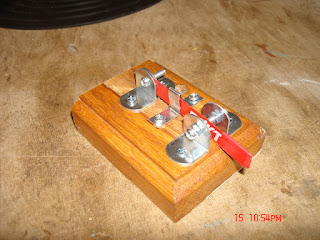
 Watching You Tube the other day I came across a chap making a simple single Paddle key. Thinking to myself that I'd never attempted a CW key build I fancied having ago!

Tony EI2KC is a very experienced CW operator and has some great videos on YouTube and one of them was this single paddle keyer that he'd built and I thought I give it a go. Consisting of a block of wood, and a hacksaw blade with various clips, it's pretty simple to make and I suspected would only take a few hours.

I've built it as a mock up to start with as I'll need to clear the blade of paint and wire it up. But for a first attempt I'm pretty pleased so far and once I've had a good check I'll start on the final result. Wish me luck!


Back to Building Antennas 40/80/160 Inverted V

I got a shock today when looking at my blog and realised that I hadn't populated it since September 2020! In my defense I have not been doing very much radio work at all, just the occasional listen and that's about all. Now the New Year is coming up fast I have promised myself to get back in to radio work, in particular get back in to some CW and also try out some more home brew antennas.

So I have started building a Dave Tatlock (KG0ZZ) 40/80/160 inverted V antenna. I do have the old W3DZZ, but it is old and so needs replacing and I'd like to have an antenna that covers 160, so this new inverted V seems just the job. Currently I am building the four coils, (evidently not traps, but coils), something I need to look in to more to find out the difference. I built a few traps particularly coax traps but no coils, so this should prove interesting. 

I've cut the four tubes, with two different lengths, the PVC circumference is 1 1/4" or 40mm, of which one is 4 1/4" in length and the other is 7 1/4" or 11cm and 18.4cm and have inserted the two end bolts to take the coil wire ends which will connect the coil wire to each element. I've also drilled out the holes for the elements wires to fasten the coils, but that is as far as I have got as I'm still awaiting the actual 18 AWG magnet wire. In the picture below, the white tube was the initial test piping for checking measurements and drilling any sample holes. 


Each coil will then need winding, which should prove interesting as the smaller tube requires 50 turns of the 18 gauge wire and the larger will need 123 turns! The secret for any winding I find, is patience and plenty of masking tape so if you have to do something else or are interrupted whilst in mid turn, you can just tape up writing the number of turns on the masking tape. Believe me, it actually works!

The lengths of the elements seem simple enough, 40 meters is 35' 10" or 10.922 m. 80 meters is 14'9" or 4.55m and 160 meters is 8'10" or 2.7m. I'm using an old extension lead (25m) and have already remover the plastic cover so that I now have x3 wires which should provide more than enough length to cover all the elements. The lengths I've given are approximate and the finished antenna will require tuning I suspect....More to follow once I have received the 18 gauge wire.

The first batch of 18 AWG wire has arrived so I've made a start on the winding's. Measuring and counting is the key as well as patience, you have to allow that things don't always run smoothly, especially the 123 turns for the 160 coil, which can prove quite demanding! Well, I've managed three coils and have run out of 18 AWG wire so have ordered some more but it's going to take at least a week to arrive, so on with some measuring of element cable. Remember measure loads of times and cut only once!


The second batch of 18 AWG wire arrived today and finally I have completed the coils. I have also managed to heat and remove the enamel of all ends so that I can attach them to their respective bolts. So they are now ready to be fitted to each element once I have measured and cut. Then I suspect the fun will start with trimming and tuning! Dave in his video reckons the coils and element lengths should be pretty accurate, but I have a feeling with the housing earth wire I'm using, things are going to need some trimming, but hopefully not adding!

I've got plenty of time as my new 30' mast doesn't arrive till February and therefore I can get things roughly set up, but cannot test properly till then.

I couldn't wait for the new mast so I built a temp one instead and after assembly the antenna was hoisted up to around 30ft. First results are pretty good, the SWR readings are not perfect at the moment but I've yet do do some fine tuning.

Top band is reading 1.1 at 1.817 which is right on the CW part of the band.
Eighty metres, is 1:1 at 3.688 and forty is 1:1 at 7.177. So first tests are pretty good. My only negative thoughts would be the SWR rises fairly quickly as you move up and down each freqs. Top band I can understand but 40 and 80 I thought would be better, e.g 1.6 by 7.220 and 1.6 by 3.7070. More playing and testing is obviously required.
Friday, September 4, 2020

QCX+ Continuation

After the first bit of fun where I completely messed up the build in thinking I was constructing a 40m version instead of a 20m, things have somewhat calmed down. The instruction manual is well written, with excellent photos, good descriptions and provided you take your time and don't rush as I did, you wont make mistakes and things should go as described.


As I write I have completed the kit and apart from 4 missing M3 screws that I'm not too sure should be included anyway, but I can't emphasize enough it was a good build from the instructional point of view, so much so that a beginner with a bit of common sense should be OK. 

As yet, I have  to do the smoke test which for me I'm dreading, with the potential screw up of the T1 torroid. I'm just hoping it will work, but honestly I really don't know and it's certainly nothing to do with QRP Labs, it was purely my mistake! I would and probably will purchase other kits from QRP Labs, they are an excellent company, even emailing me during the pandemic to say how my order was progressing!

Once I had corrected my mistakes the rest of the build was fairly straight forward, with no difficult issues or problems. Once completed I was struck by how good and simple the design was. But that's the reason why the original QCX design sold 10,000 kits!

The enclosure is fairly simple yet strong and sturdy. There is certainly no need to make your own, this one will do the job brilliantly.


The picture above is not too clear but gives the general idea. Incidentally the kit is sitting on the manual, that's how much information regarding building etc you get...134 pages, pretty impressive!

Once I have built up enough courage I will do the smoke test, hopefully have a very large drink and report back and then on to the next build!!

...........Just to add, smoke test completed and although it switched on my LCD display was just showing one line of bars. After a thorough check of soldering points and some re soldering and also repositioning of the micro chip The radio sprang in to life, excellent! Now I have to align and do some other tuning and then hopefully we have a good little rig to play with.

Sunday, August 30, 2020

The QCX+ 5 watt Transceiver - Dumb Mistakes Already!!

Finally the kit has arrived, but it had to wait as I was still in the process of finishing off the Rockmite and the Texas Topper (see posts below). Over the past few days I have started to build the kit after taking a further two days checking the inventory and reading over the manual. 

The first and I can only say dumb mistake I made was winding the T1 Torroid, It wasn't that there was anything wrong with the winding's, in fact it was perfect. Four different winds on a small torroid, eight connections, as I said perfect.  I'd even fitted it to the circuit board as instructed and begun adding some capacitors  when I realised I had some capacitors missing and saw the bag marked 20m LPF! It suddenly dawned on me I had been in auto mode and for some stupid reason thinking I was building the 40m version (as per the Rockmite) instead of the 20m version!


The giveaway!

Believe me, there was a lot of swearing when it dawned on me what I had done. Bloody typical that torriod was regarded by the manual as very tricky and I had just completed and fitted the 40m version perfectly, I was livid.

Now came the awful task of removing 4 capacitors and the 8 connections of the torriod, then reducing one of the winding's from 38 to 30 and three sets of 5 winds to 3. I honestly thought that's it, I ruined the kit before I had even got going! Miraculously, and I really don't know how, somehow, with much patience, I managed to remove and then fix and reset the torroid.


The torroid and capacitors refitted !

The PCB doesn't look too bad from the top, but underneath I had some scary moments where the tracking began to loosen through me heating and wiping off some solder to reopen the holes.


You can see the mess on the three triangular holes and the center track looks pretty beaten up, but I've checked and rechecked and the connections look OK. Somehow I got away with that stupid mistake. 

The morale being the usual, read and read again the instructions and don't confuse your 40m Rockmite with your 20m QCX+

................More to follow over the next few days!

Saturday, August 22, 2020

The Texas Topper 5 Watt Amp

Before moving on from QRPme and the failed Rockmite that didn't live up to my expectations. I also purchased the Texas Topper, a 5 watt amplifier. This I thought would go nicely with the 4 Rockmites that I own and could provide me with a bit of oomph should the need arise!

Once again, how can I explain, I've built the 4 Rockmites, an OHR 100A, even a K2 so I'd like to think I'm not a novice builder, but even I was struggling with the instructions. When you have built something like the K2 or the QCX and even the early Rockmites the instructions are superb. They take you along the fun and the ride of the whole process, good instructions will also explain why your doing something so you can learn and understand the whole build process.


Sadly with QRPme they seem to be blunt and to the point, not really teaching you and expecting you to know things that really aren't that clear. Also once again I also had the wrong parts so I have had to order five more capacitors, annoying to say the least.

The Texas Topper has been constructed, but once again with little satisfaction by me, I feel sort of empty, not quite fulfilled.

The picture shows it all, built but missing parts, which are all on order. I shall now have to wait another week and probably struggle with the completion yet again. Incidentally my rockmite transistor part appeared the other day which fixed the receive problem, but unfortunately I still can't transmit so more investigation work is required.

To sum up I don't think I'll be buying anymore kits from QRPme, sorry but that the way it goes!

Tuesday, August 11, 2020

40M Rockmite From QRPme

I can't remember if I said in a previous post that I had a new Rockmite on order from a few weeks back. It was the 40m version, I wanted to see if there is any difference from the old days of when I bought three 40,30 and 20M from Dave Benson K1SLW, which really got me started in building QRP.

I was aware Dave Benson K1SLW was retired and had handed the Rockmite business across to someone else, but I didn't know who, so obviously I did a bit of searching on the web and came across QRPme. QRPme is run by Rex Harper W1ERX. The other thing I didn't realise was that Kanga Products was the UK operation for QRPme and in my rush, I went straight to QRPme to order the Rockmite.

The package duly arrived from the States and of course I had to pay custom duty! This seemed to be the first of many issues. On opening up the package and inspecting the contents, I realised the "Dave Benson" personal touch had gone.

Whether it's through QRPme being bigger, or Rex hadn't the time I don't know, but that personal touch has disappeared. That easy to read instruction manual with those marvelous pictures of all the components and everything explained had gone and in its place a few sheets of accurate instructions, but not with a beginner in mind.

Waiting for parts

Sadly that wasn't all. Some components were missing and I found a mixture of different parts, but for other bands, but not all complete. For instance, I was missing 3 capacitors for the 40m kit but had the right capacitors for the 20m kit. Also where I should have the crystals for 40m I had the 20m set, which made me double check and think if I had originally ordered the 40m kit!

The wrong crystals

So in conclusion I have had to reorder some components and crystals from Kanga Products and have been left disappointed and saddened that the Rockmites that started me on the road to QRP building is in a way no more. Sure the Rockmite is alive, but slicker and corporate. It still relatively easy to build, but sadly lacks the personal touch Dave Benson seemed to add.

I think if you look at the website there's a lot products on there, I don't know how big QRPme is, but it just feels to me that everything was rushed if that makes any sense. Maybe I was just unlucky! Let me know if you've had a good experience with QRPme.

Monday, August 10, 2020

Emtech ZM-2 ATU

 I came across this ATU kit while searching the web for a tuner specifically for my Rockmites and other QRP rigs as the Tokyo HC 400L ATU is too big for the low power.

All the reviews I'd read, pointed towards a good, easy to build QRP tuner. So I decided to go ahead and purchase. In under 10 days it arrived promptly from the States, custom free and well packed. 

The instructions were well layed out and even a beginner could quite easily complete this kit. The only process that might be deemed difficult for some were the two toroids, but to be honest they were not that difficult, but being the lazy person that I am, I got the main T130 toroid wound for me for an extra $5 which I thought was pretty cheap! To be honest and my only moan was the T130 had been wound but the 2nd SWR indicator toroid which is much smaller hadn't been and if I'd known this at the start I wouldn't have bothered paying the extra $5 as I find smaller toroid's harder than the larger ones to wind! 

But no matter, I'm not a complainer about winding toroids, the're a necessity and I just get on with the job. Otherwise installing the components and the switches was pretty easy, there's not a lot of room when installing the 2nd toroid, but if you're careful it fits all in.

The tuner even comes with two sets of decals which you can then spray with varnish or  similar screening, provided they are stuck on accurately they work well.

Once finished it's extremely easy to operate, which makes it a joy to work. I really like this bit of kit and for the price you can't go wrong. It will be ideal for the new QCX+ kit that I'm waiting to arrive!


Tuesday, July 28, 2020

Chinese Manual Kit ATU Off eBay

I saw this advertised when browsing on eBay and thought for £8.79p you can't go wrong at that price! Or so I thought, an ATU kit complete with box, stickers all the bits, it was a reasonable deal and if you messed up it was only a few pounds. 


It didn't take too long to arrive about 3 weeks from China, well packed and it was all there, the only problem of many to come, was there was no instructions!

Browsing across the internet I guessed there must be something and sure enough when looking at Tinker John's YouTube video W5CYF (who does very good instructions btw) . He had a link to some half Chinese/English  e manual which I duly printed off. Obviously Tinker John had had a go at building the Chinese kit as well and he got it working, but didn't seem too impressed by the instructions, I got the impression he more or less just built the kit via the pictures!


Well, together with the Tinker John video's and the instructional pictures, I tried to follow it all and eventually got there. But to be honest the circuit board was misaligned, the instructions for drilling in to the container were totally off and Winding the large torroid and twisting in the tapping points was an absolute pain (and normally I don't mind winding torroids). Finally, you needed and engineering degree to work out how the variable capacitor knobs were fitted on to their respective capacitors and I'll admit there was a lot of it was re jigging and re drilling!
In the end and to fair I just followed Tinker John's advice and looked at the pictures and the one schematic diagram and somehow got there . 


What surprised me was linking and connecting it all up to my W3DZZ and my antenna analyser and finding it actually worked!!

What surprised me even more, was that it worked reasonably well, enough to for me actually use my K2 and the Rockmites. So for £8.79 and if you're prepared to have a bit of fun and struggle, but if you're dedicated you will get there, I would buy the kit and have a bit of fun, after you can't go wrong for £8.79 or $11.32!

Saturday, July 11, 2020

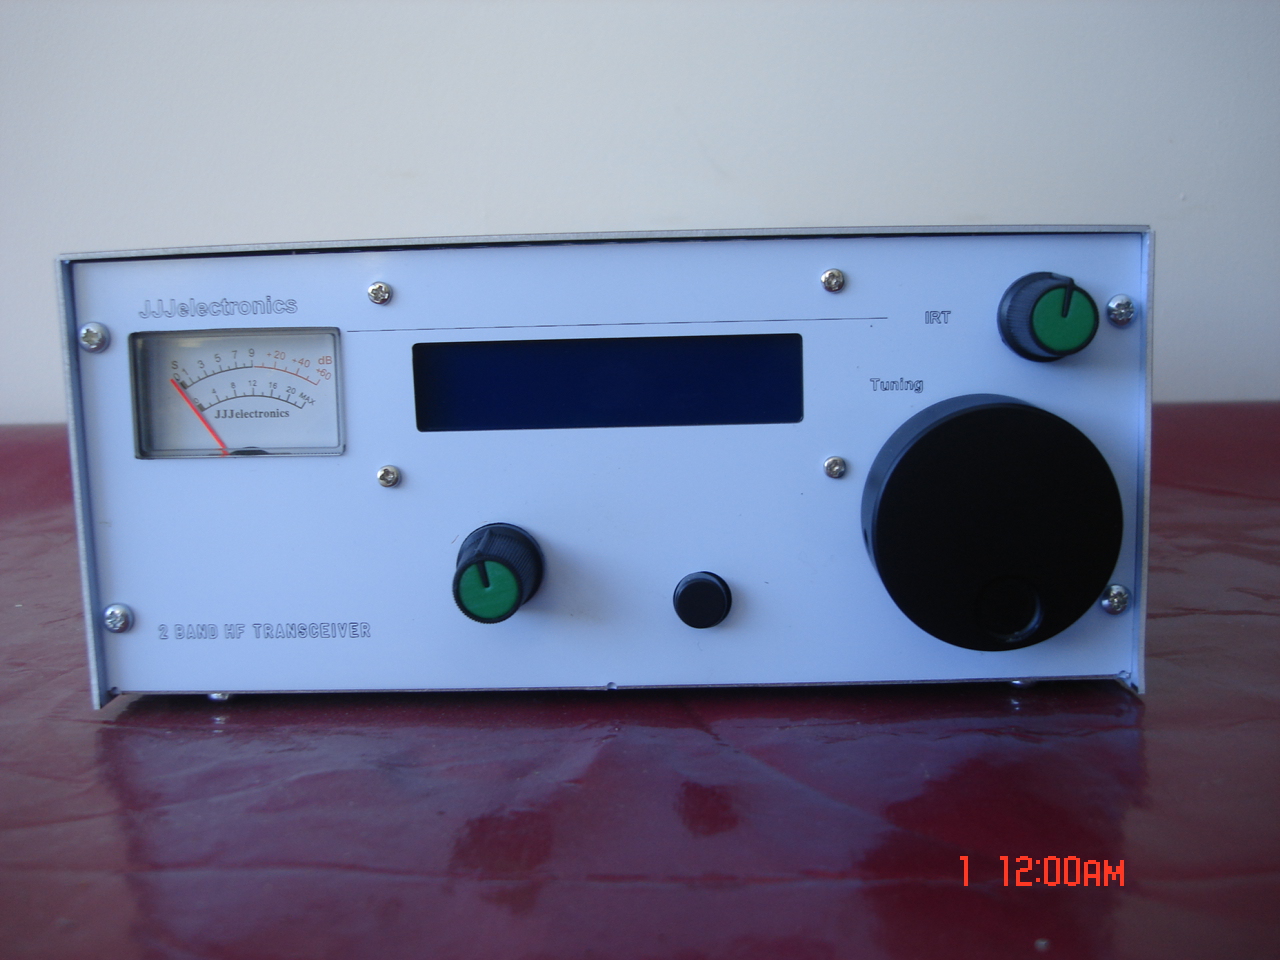
JJJElectronics QRP Transceiver 20/40M

Well, what can I say that's good about it, honestly very little. I paid nearly £85  for a ready built transceiver, calibrated and aligned, but I'm afraid it's probably the worst £85 I've spent on a radio. This probably through impatience and stupidity on my part, I should have waited , but as usual jumped in with both feet!(What I should have done is bought the kit for £35 instead).


A fairly simple face for a simple transceiver

I had to install an on/off switch and a jack for headphones. The initial set up was some female plugin wire setup for both the speaker and power which was quite frankly useless. On powering up the transceiver it drifts like mad and maybe (and I say this loosely) after 20 minutes of warm up it may steady a little. The only time you can hear any Morse on 20M is mid morning, as the rest of the time you are plagued with MW. Similarly in the evenings this happens on 40.

You can see where I added the on/off switch and the ear jack

But I suppose that's what you get when buying a QRP rig off eBay. It's not badly built and the guy knows what he's doing. But the design is appalling and when you see something as good as the QCX QRP rig that is priced at $49 it does make you wonder. The morale of the story is, steer well clear of JJJElectronics on eBay, don't make the mistake I did. 

Still, I have now got loads of spares for my next new QRP rig whatever that will be!

Thursday, July 2, 2020

Rockmites and Other QRP Radio

Regulars to this blog will know I do like some QRP and during the lockdown in this country I was back working with the Rockmites. I have three at the moment 40,20 and 30 Meters with a fourth on the way.
 
 
The 20 and the 40 are in the same type of container as above and the 30 below is in a small metal tin.


Small Wonders Labs is no more as Dave Benson has retired and so the Rockmite works has been passed on to Rex Harper W1REX with his very successful website www.qrpme.com .
 
 I’m interested to see what has changed and if there are any improvements etc to the build process. I hanker after the build and the challenge of trying to get contacts with 0.5 watts. Sometimes you get lucky and have great QSO’s with these wonderful little radios and other times you’re sitting for hours trying to get a reply, swings and roundabouts!
 
I also have an OHR100 5 watt transceiver, a 5 watt 20/40 mts transceiver by JJJelectronics and of course the Elecraft K2.
 
The OHR 100
 
One final rig I’m waiting for which I am relishing the build is a QCX –plus by QRP Labs this is their follow up from the famous QCX transceiver that sold somewhere in the region of 10,000 kits, so was very successful.
 
The new QCX+
 
Another kit I’d like to have the challenge of a build is the K1 and I suspect in the future, I shall no doubt purchase and build one.

Tuesday, June 16, 2020

Invertd L W3DZZ 40/80 and Top Band Antenna


The W3DZZ Top band Inverted L is a great antenna if you want to get on top band but never thought it possible because you are limited to a small garden. It doesn’t have to be in a straight line, you can bend to your garden shape and it should still work pretty well.
The lengths are divided up in to 9.9 metres followed by the 7MHz trap and then 6.55 metres to the 3.5MHz trap and then another 8.54 metres. A good earth is needed with a ground rod, but preferably some ground radials would be even better.
As usual the higher the better for the antenna, but it will work at 15 or 20 feet if limited with height.
The traps are the simple coax fed, divided up to 20 turns for the 80 meter and 11 turns for the 40 meter on a 40 mm PVC water pipe former with simple solder connections as shown in the diagram.


Below are my traps which took about an hour to build.
Forty
Eighty
The top band length shown will give a 1:5:1 SWR at around 1.9MHz. If you are limited with height try to put in more ground radials if you can.

The picture below shows it going over original designer’s house, but as I said before you can bend it to how you want. I’m lucky enough to have it as a straight dipole, but last year I had it up as a horizontal L shape round the corner of the garden and it worked well.

Do experiment with this antenna, especially now it's summer and you can get it ready for those dark nights when top band and eighty start coming in to their own. Once set up correctly to your particular situation it will work really well for those lower bands!


Forgive the quality of the camera work, but hopefully you get the idea with the  W3DZZ  about 10 meters up!


This shows where the coax is split to the shack and the earth goes to the ground radials from the DX Commander


Thursday, June 11, 2020

DX Commander & Rebuilding W3DZZ Top Bander

I don't know if you have come across this antenna before but information is widely available on the internet. Which is where I first saw it and then came across the youtube site of DX Commander. Cullum is a bit of an odd ball to say the least, but is very entertaining and knowledgeable about his product. So much so that he convinced me and having read the various favourable comments as well, I ordered the DX Commander Classic multi band antenna.

 Basically it's a vertical 10 metre fibre glass pole with a number of elements in parallel attached to it , in turn you connect the elements up to a number of ground plane radials by a series of aluminium plates. Very neat and tidy but simple, but then all the best ideas seem to be simple and it works very well. I have to say I'm pretty impressed and with the price. It's now raised up in my paddock and within a few days of erecting I've had contacts from all over Europe, across the pond and in to the far reaches of Russia. By the time the cycle picks up I'll have no problems getting VK and ZL.

I now have the W3DZZ up for 40 and 80 meters, the Hustler which is a sort of back up antenna which is the 6 bander and now the DX Commander which is setup for 10, 12, 14 and 30 meters. Regular readers will probably remember me mentioning the W3DZZ sister antenna (40, 80 and top band) that I experimented with back last year. Well I am in the process of rebuilding, I am using the two old coaxial traps (80 and (40) which I have reset and cleaned up and am just waiting for the new wiring for the element.


The whole length of the antenna is roughly 25 metres but obviously split up with the traps. I hope to use the ground radials from the DX Commander with the top band antenna and I'll stretch it out across my paddock. I've already setup and prepared some poles for the antenna to hang, so now it's just waiting for the postal service to drop the wiring off!


The picture above shows how it would be set up over a house, but I plan to have it raised up, but in my paddock. The picture below shows my previous attempt and how simple it is when completed. I think where I went wrong last time was that I didn't really plan how I was going to raise and keep up 25 metres of wire and two traps. It was always a bit fragile, it never felt solid, also the tuning could have been better. So this time I'll take my time and do things slowly!


Radio wise I still have the FTDX 5000MP and the FT 1000D as back up and of course the trusty K2 and a number of QRP rigs. Sometimes I get itchy and want to sell and buy, but in honesty the 5000 and the 1000 are superb rigs and really why bother?

Thursday, June 20, 2019

Out with the Old and In With the New

It's been a while since my last post but unfortunately as usual work and other projects have got in the way of radio. Suffice to say conditions have not been good and the only stations I have been hearing lately are the Europeans and some Russians but otherwise fairly quiet. The delta loop antenna has been useful as it has a quiet receive but as I have said conditions have been very bad.

I have a new transceiver an FTDX5000MP . I saw it on eBay and the seller was asking a fair amount of money for it, but mentioned at the end of his description that if it was the right radio he would also be interested in a part exchange.


I wrote to him asking if he'd be interested in my FTDX9000MP, as I have decided after having the stroke it is now too big an heavy for what I need. Although a fabulous transceiver which normally I wouldn't part with, I feel now the time is right. It's such a heavy beast and takes up half the radio room! 

The seller, a chap from Wales was interested in the 9000 and asked for pics which I duly sent. In the evening he was round at my house having travelled the 110 miles to get to me in the late afternoon, I think he was keen!

His FTDX5000MP was mint having still got the plastic covers over the screens. After a cup of tea and some chatting we did the swap and within an hour he was on his way home with his 9000 and I was happy with my new 5000, all was done and dusted by supper!

The FTDX5000MP is a very nice rig and the size compared to the 9000 is much better for me. Should the need arise I will look for an amp but at the moment I;'m perfectly happy with the 200W. It also has the Station Monitor SM-5000 which incorporates the speakers which is a nice touch.

I will have a play and then do a full write up, but initial reports are good and this seems like an excellent radio. I will miss the FTDX9000MP but I've had some good time with it and now is the time to move on.

Farewell My Sweet!

Thursday, February 7, 2019

The M0PLK Delta Loop Antenna

So at last the weather has turned for the better and I have been assembling the M0PLK Delta Loop which came from Poland. I’m amazed at the quality of various parts that make up the antenna, you don’t get this sort of quality with other local commercial antennas.

To start I had to make up the ladder line, I tried to follow the instructions which I managed to find on the website, but of course it was in Polish which was no  help to me. Instead I followed the pictures and I'm pretty certain all was OK, but for peace of mind I did a google translation at the end of the build just to be sure!


Each upright side of the Delta Loop is made from  aluminium tubular extendable poles and the cross section is 12 gauge wire, which is the same for the ladder line, nice and strong. There are excellent plastic connectors for the ladder line, 7 in total which are fairly easy to assemble.


Connecting the cross wire is again fairly easy, it has a couple of wire clamps with the wire circled over the top of the aluminium tubes and then clamped to fix it in position. The centre piece connects the two wires together with the ladder line. The bottom of each aluminium tube is connected by a single wire. The two aluminium poles are then clamped on a vee shaped piece of aluminium by six larger clamps.


The vee already has the balun attached to the aluminium plate, so it’s just a matter of fixing the ladder line to each side of the balun.


The pole are then extended and you add some jubilee clamps to each pole extension. Hay presto, the antenna is then completed!

I should have it assembled and up on its new 5 metre scaffold pole by the end of the week, subject to my work of course! I'll do another blog to see how it actually behaves when in use.
It will be interesting to compare with the homebrew, but I suspect "compare" will be a bit far fetched, but well see. The home brew has had a replacement fibre glass pole added as the one that was damaged was too far gone to repair.

Good news, I managed to assemble the antenna over Saturday and so far without serious testing it's sounding and looking pretty good. Certainly it knocks spots off the homebrew for receiving and transmitting. I did do a very quick comparison with the Hustler and initial results were pretty good. 


I'll do some more testing in the next few days and write up the results. As I write, the wind is starting to pick up again so I may well drop the antenna down for the rest of today. It's easy enough to do as its clamped to one of my scaffolding poles which is in the old sleeve cemented in the ground which was for the yagi. So it can just be lifted out and layed out on the ground for the moment.


It's certainly a lot tighter all round than the homebrew and the aluminium poles seem to be a lot stiffer than the fibre glass. As I mentioned earlier the quality is much better than you would get in the UK!

Friday, February 1, 2019

Delta Loop Set Back!

Calamity, the home brew Delta Loop Antenna has broken. With the high winds and the mini Blizzard we are suffering this morning, there must have been a strong gust and one of the fibre glass poles broke. 


Looks like it's broken clean in two which is a pity, but I have to admit I new it was pretty flimsy so it's not exactly unexpected. But the wind must have been reasonably strong for it to break a glass fibre pole!


I suspect somewhere I have a spare pole or certainly a section hidden away so I should be able to replace. But obviously I'll have to wait till the weather clears. In the meantime I just have the Hustler antenna to play with so all is not lost.


Talking of playing, I received an email from the guy I was hoping to do a deal for the new K3 but that has unfortunately fallen through. The chap decided he wanted to keep his radio. So With the FTDX 9000 MP currently in storage, I thought I'd have another play with it today and unpacked it. Of course once unpacked and set up I was wondering what an earth I was doing trying to swap it, it is such a beautiful radio, I must have been having a mad moment!

Wednesday, January 30, 2019

Delta Loop Progression

The new M0PLK Delta Loop antenna has arrived from Poland. I've yet to unpack it as the weather has been awful, very cold and damp, not really construction weather. So I'm waiting for something a little warmer so I can build the new antenna at my leisure and not freeze while doing so!

The home brew Delta Loop is working reasonably well, so I'm in no rush while this cold weather continues to build the new antenna when this home brew seems to be working OK. I say that, but QSOing around Europe the signals seem to be down when using the homebrew, it maybe a short or something else as we have had a few gales recently and the antenna is not that strong. However once I get the new one up I'll be able to compare notes and see how they both perform.


I saw an Orion 565 mk2 advertised on a website the other day, I always hankered after an Orion especially for CW purposes as they always seem to get rave reviews. The chap selling was also interested in a swap and as I have a few radios I could exchange, I wrote to him looking for a deal. Sadly though when I saw the Orion in pictures, it was not in such a good condition and needed a lot of cosmetic work to get it up to scratch, so sadly no deal was struck.

Interestingly on swaps, there's a chap who has a brand new K3s literally says it six weeks old. Again a Ten Tec or a K3s are something I've always wanted to own. This chap is interested in my FTDX 9000, so negotiations are currently taking place, if I can get a similar price I paid my brother in law for the FTDX, I'd be very happy with a brand new K3!

Friday, December 28, 2018

Further Notes on the Delta Loop

Waiting for the parts to arrive has taken some time, mainly I suppose because Christmas got in the way, but at last all the bits have arrived and I am able to continue the build with the Delta Loop.

Assembling all the parts on the main lawn also took some time but this was due to the weather, I wasn't going to rush when it's pouring with rain. Finally after a bit of patience we got there and the poles were fitted, the element wire pulled through and the ladder line measured and fitted and finally placed on a short piece of scaffold pole and up she went.

Just put up before dusk!

I must admit I wasn't expecting anything terrific first time, I hadn't tuned, played or tweaked in any way. But I tested on the FT1000  just to see if I could receive and get out. Well blow me, I got a result straight away. Measuring against the Hustler it was very quiet I almost thought it wasn't working at first it was so quiet!


A little closer

Using the Hustler I found a reasonably loud CW station then switched over to the Delta Loop. First impression was the background noise from a vertical like the Hustler was gone, although it was down an S point most probably due to it being so low off the ground.  I hadn't tuned or played with it in any way, so I could probably tweak it for better results plus I'd been using the auto tuner from the FT1000, not the manual Tokyo 400L. 
For a quick home brew job I was pretty impressed.
The next thing is to raise it a bit to give it some height, see if that improves it being down a S point to the Hustler.

Now I'll let you in to a little secret, a few days ago sitting talking to my Brother in Law over a glass of wine about delta loop antennas, we were mulling over M0PLK design and whether it was as good as everybody says. So in the spur of the slightly tipsy moment and after looking on the web at some Polish website 
I decided to buy an original M0PLK Delta Loop! The only place I could find one was at this website in Poland, well, M0PLK is polish! No other retail shop in Europe had them, Is that a good or bad sign?

£188 for the original M0PLK design, actually not a bad price, plus they have good reviews on Eham. So I'm expecting this in the New Year and I will compare notes with the homebrew to see how it performs. If its as quiet as this homebrew I shall be well impressed!

Tuesday, December 18, 2018

The Delta Loop

This delta Loop is going to be slightly different as it's based on the M0PLK design which is the vertical triangle but with the 4:1 Balun at the base and is fed by a 450/600 ohm ladder feeder, the wire element is held in place by two fibre glass poles in a V position.

This is a multiband antenna that should cover 30 meters through to 10m. Trolling the internet I've been trying to find a replacement antenna that will not cause too many problems when its situated in my paddock. If you have read earlier posts, you will see I have had the local Council informing what I can and cannot put up!

This delta Loop should be camouflaged in front of some trees, does not need to be that high and is a quiet antenna that puts out a reasonable performance. Well that's what other users say on Eham, so I shall put it to the test and build one.

So far I have bought the two fibre glass poles at 7 metres in length although I suspect 5 metres will suffice. I've measured and cut the wire (17 meters) and ordered and received the main aluminium plate 350mm x 400mm, 8mm thick, which I have trimmed and drilled the holes for fixing the fibreglass poles. the idea being to make it reasonably close to the picture below of an original M0PLK Delta Loop.


The balun is fed with a 400/600 ohm ladder line and I have decided as a bit of fun to build my own 600 ohm ladder line.  I had a commercial 450 ohm feeder but thought as I'd never constructed a ladder line before I would give it a go, so if the 600 fails I can always fall back on the 450 ohm!

The main plate is made of 8mm solid aluminium 350mm x 400mm. I wanted something reasonably strong so I may have gone over the top but as far as I'm concerned the stronger the better.


You can see I've drilled the holes to hold the fibre glass poles these will be standard plastic brackets. The Balun is a small 200 watt 4:1 I had as a spare to show you where it will sit, but I have ordered a larger 1K version. The picture below shows the poles (not extended) in place together with the 16 gauge wire, just at the top of the picture is the home brew ladder line.


In the middle of the plate rising through the centre, a 5 metre two inch mast will be used for the plate to attach to, as you don't require any great height for this antenna, but obviously its the old story of any higher will be better, but I'm limited thanks to my Council!